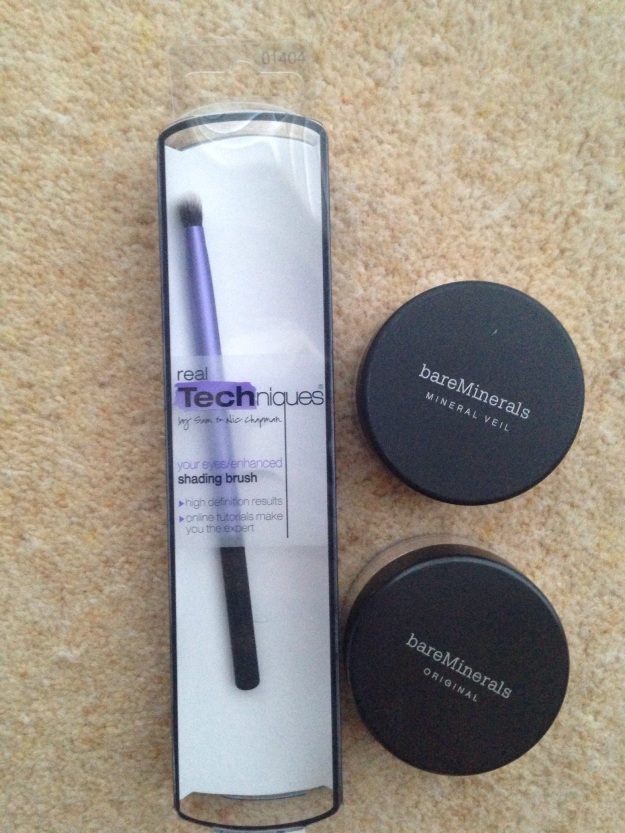
The name of this post may be deceiving. I have indeed had a massive beauty haul recently but I am splitting this across posts because I have so many new items I couldn’t possibly talk about them all in one go. I don’t know if I’ve mentioned previously (ahem) but I’m getting married this year in May – it’s coming round so quickly!! I’ve made the very brave decision not to hire a make up artist and to do my make up myself as I am a little bit funny about other people messing about with my face.
In order to do this I thought I should invest in some new products and tools to make sure I can do the job properly. I’ve established a good skin care routine full of products that work best for me – Origins if you hadn’t guessed, and that I know won’t break me out or irritate my skin, but more on that another time.
I’m a bit of a creature of habit, but I put this down to knowing what works best for my sensitive skin. I always use mineral powder on my skin as liquid foundation just never works for me, even the lightest ones feel too heavy, and even the matte ones end up shiny. Believe me I’ve tried but I just can’t use them! Powder is so easy because I can just sweep it on and then reapply on the areas I need it later in the day. Recently I’ve been using Mac Mineralize powders but I decided to go back to an old faithful for the wedding – Bare Minerals.
My mum bought me the starter kit about 3 years ago and I still love their products now. I invested in the colour closest to my skin (sensible) which is Fairly Light, and bought the Original formula. This is SPF 15 which is ideal for my fair skin, isn’t too matte/drying, but keeps shine at bay and has fairly good coverage without you looking caked in make up. Bare Minerals use the ‘swirl, tap, buff’ notion of applying which is just what you do, swirl your brush in the colour tipped in to the lid, tap off any excess and then buff into your skin. I’ve been wearing this for work and it gives good coverage for most of the day – I use an oil absorbing sheet to get rid of shine half way through the day, and if I’m going anywhere straight from work I apply a light sweep of more powder with a lighter brush.
I remember the starter kit having a tester pot of the Mineral Veil as well – what I remebered was an incredibly light, translucent powder that was great for applying over the foundations to mattify and refresh throughout the day. This comes in 4 formulas – original, hydrating, tinted and illuminating. I read some reviews and opted for the illuminating formula which claims to give you an airbrushed, soft focus finish to your make up in photos – what more does a girl need on her wedding photos! When I trialled this I applied it on my t-zone and across my cheekbones. In person, it looked lovely if slightly more shimmery than expected, but on photos, for me who likes a fairly matte natural finish, it made my skin look a little too shiny particularly where I’d applied on my forehead – no one needs a shiny forehead. I’ve refined my application now and apply a light sweep under my eyes and on my cheek bones which gives a lovely soft focus finish to eyes and softens my (very slight) lines and highlights cheekbones. I also applied a little down the bridge of my nose. I left the rest matte and I’m pretty happy that this is the best use of this product for me. I am however, going to invest in the original mineral veil because I want a nice light invisible powder to set my whole look.
In addition I wanted to reinvest in some tools to help me apply all my lovely make up. I am happy with the powder brushes I already have – these are by Bare Minerals and I use their full coverage brush and light coverage brush for applying this. The one thing I have never invested in is eye tools, but this is mostly because I never seem to wear eye shadow. I have recently discovered that I quite like soft smoky eyes and decided I needed the right tools to do this so a new eyeshadow brush was a must. I went for the Real Techniques shading brush. I don’t have the skills to apply elaborate eye make up but this gives a nice finish and helps me to build up colour in the areas I want it.
I also bought their fine liner brush. My regular make up look is cat eye flicks, but I wanted a softer version of this for the wedding, so I’ve been practicing this with a silvery grey version of the Maybelline Colour Tattoo cream gel shadow, for a long lasting smudge proof subtle look, and this works perfectly. I then use the same brush to apply a black gel liner right in at my lash line to make my lashes appear fuller.
Now, if you’re thinking I must have spent a fortune, you’d be little bit wrong. I say a little bit because none of this stuff is cheap, but I bought it all off Escentual, which meant that it was all bought for less than you would pay in the shops, and I got free delivery for being over £40. So a bargain really… kind of.
I’ve been practicing my make up every week since, and will update you with the rest of my products shortly! Does anyone have any good tips for bridal make up?
